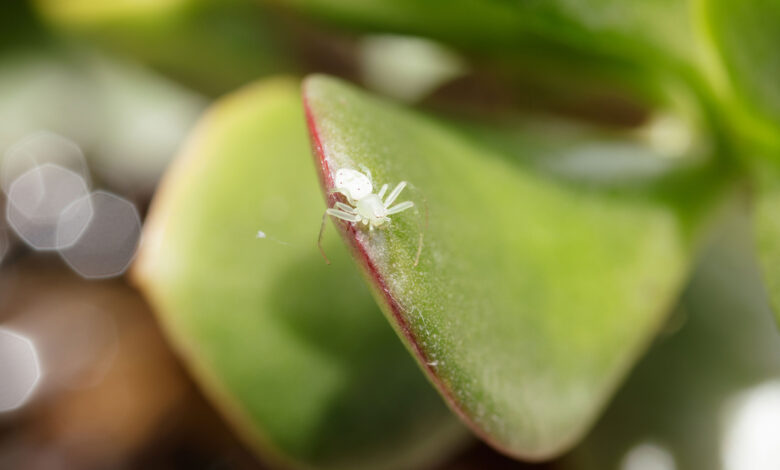
I noticed tiny yellow specks on my calathea leaves and ignored them for a week. Big mistake. By the time I investigated, fine webbing covered the plant and spider mites had spread to three neighboring plants. That infestation taught me everything about these destructive pests the hard way.
Spider mites are among the most common and frustrating houseplant pests. They reproduce rapidly, spread easily, and can severely damage plants before you even notice them. But you don’t need harsh chemicals to win this battle.
In this guide, I’m sharing proven natural methods to eliminate spider mites from your houseplants. You’ll learn to identify infestations early, treat them effectively with organic solutions, and prevent future outbreaks. These methods actually work – I’ve used them to save dozens of infested plants.


Understanding Spider Mites
Knowing your enemy is the first step to defeating spider mites. Understanding their biology helps you target treatments effectively.
What Are Spider Mites?
Spider mites are tiny arachnids, not insects. They’re related to spiders and ticks, which explains their eight legs and web-spinning behavior.
Adult spider mites are barely visible to the naked eye, measuring less than 1mm long. They look like moving dots – red, brown, or yellow depending on species.
The most common indoor species is the two-spotted spider mite. These appear as tiny red or brown specks that move slowly across leaves.
Their size makes early detection challenging. By the time you see obvious webbing or damage, the infestation is already established.
Spider Mite Life Cycle
Understanding their rapid reproduction explains why infestations explode so quickly. Female spider mites lay up to 20 eggs daily throughout their 2-4 week lifespan.
Eggs hatch in just 3 days under ideal conditions. The immature mites go through several stages, reaching adulthood in about a week.
This means a population can double every few days. A few mites become hundreds within two weeks, and thousands within a month.
Temperature affects reproduction speed. Warm, dry conditions (above 80°F with low humidity) accelerate their life cycle dramatically.
I’ve seen light infestations become plant-covering catastrophes in just two weeks during hot summer months. Their reproduction rate is genuinely shocking.
Why They Love Houseplants
Indoor environments often provide perfect spider mite conditions. Central heating and air conditioning create the warm, dry air they thrive in.
Low humidity is their best friend. Spider mites struggle in humidity above 50%, but most homes stay around 30-40% during heating and cooling seasons.
Limited air circulation indoors allows populations to build without natural predators or weather disrupting them.
Stressed plants are more susceptible. Underwatered, over-fertilized, or otherwise weakened plants attract spider mites like magnets.
Identifying Spider Mite Infestations
Early detection makes treatment much easier. Learn to spot the warning signs before infestations become severe.
Early Warning Signs
Fine stippling or tiny yellow/white dots on leaves is often the first visible sign. These are feeding marks where mites have pierced leaf cells.
Stippling appears on leaf tops initially, concentrated along veins where mites feed most actively.
Leaves may look dusty or slightly faded. This dull appearance results from thousands of feeding punctures damaging leaf surface.
Close inspection reveals tiny moving specks, especially on leaf undersides. Use a magnifying glass or phone camera zoom to see them clearly.
Hold white paper under leaves and shake the plant gently. Mites fall onto the paper where they’re easier to see moving.
Advanced Infestation Signs
Fine webbing appears on leaf undersides, between stems, and around new growth. This silk protects mites and their eggs.
The webbing looks like extremely fine spider webs. It’s often mistaken for dust or lint until you look closely.
Severe infestations create visible webbing that drapes between leaves. At this stage, hundreds or thousands of mites are present.
Leaves turn bronze, yellow, or brown as extensive feeding damage accumulates. Heavily infested leaves eventually drop off.
Plant growth slows or stops completely. The feeding damage prevents normal photosynthesis and nutrient transport.
Plants Most Susceptible
Some plants are spider mite magnets. Be extra vigilant with these varieties:
Calatheas and marantas are extremely susceptible. Their thin leaves and preference for humidity make them vulnerable.
Ivy (English ivy particularly) attracts spider mites readily. The dense foliage provides perfect hiding spots.
Fiddle leaf figs commonly suffer infestations. Their large leaves show damage clearly but harbor mites on undersides.
Palms, especially areca palms, frequently host spider mites. Check between fronds regularly.
I’ve fought spider mites on all these plants. Now I inspect them weekly during hot, dry months when mites are most active.
Natural Treatment Methods
These organic approaches effectively eliminate spider mites without harsh chemicals. Combine multiple methods for best results.
Water Spray Method
Strong water spray is the simplest and most immediate treatment. It physically removes mites, eggs, and webbing from plants.
Take infested plants to the shower or outside. Use a strong spray to blast all leaf surfaces, especially undersides.
Focus on leaf undersides where most mites hide. Spray thoroughly into all crevices, along stems, and around new growth.
The force knocks mites off while the water drowns many. This single treatment can remove 70-80% of the population.
Repeat every 3-4 days for two weeks. This catches newly hatched mites before they mature and reproduce.
Water spray works best for plants that tolerate getting wet. Avoid this method for fuzzy-leaved plants like African violets.
After discovering this method, I’ve saved many lightly infested plants with nothing but persistent shower treatments.
Insecticidal Soap Solution
Insecticidal soap kills spider mites on contact by breaking down their protective coating. It’s safe for plants but lethal to mites.
Purchase commercial insecticidal soap or make your own. Mix 2 tablespoons pure liquid castile soap per quart of water.
Spray thoroughly, coating all plant surfaces. Pay special attention to leaf undersides where mites congregate.
The soap must contact mites directly to kill them. Thorough coverage is essential for effectiveness.
Repeat every 5-7 days for three weeks. This catches mites at all life stages as eggs hatch.
Test on a small area first. Some plants react negatively to soap treatments, showing leaf burn or spotting.
Apply in the evening to prevent sun damage. Soap residue can cause burning if plants are in direct sun while wet.
Neem Oil Treatment
Neem oil works through multiple mechanisms. It kills mites on contact, disrupts their reproduction, and deters feeding.
Mix according to product instructions, typically 1-2 tablespoons neem oil per quart of water with a drop of dish soap as emulsifier.
Spray plants thoroughly, focusing on leaf undersides and areas with visible webbing.
Neem oil has residual effects lasting several days. This provides ongoing protection between applications.
Apply every 7-10 days for a month. The oil disrupts mite life cycles, preventing population rebounds.
Some plants are sensitive to neem oil. Test on a small area and wait 24 hours before full application.
The smell is strong but fades as the oil dries. Many people dislike the odor, but I find it worth tolerating for the results.
Rubbing Alcohol Solution
Rubbing alcohol kills spider mites instantly on contact. It evaporates quickly without leaving harmful residue.
Mix 1 part rubbing alcohol (70% isopropyl) with 1 part water. Add a few drops of dish soap to help it stick to leaves.
Spray lightly on infested areas. Focus on visible mite clusters and webbing.
The alcohol dehydrates mites rapidly. You can watch them die within seconds of application.
Reapply every 3 days for two weeks. This aggressive schedule prevents population recovery.
Use cautiously on delicate plants. Alcohol can damage tender new growth or thin leaves on some species.
I reserve this method for severe infestations on hardy plants. It’s dramatically effective but requires careful application.
Horticultural Oil
Horticultural oils smother spider mites and eggs by coating them in oil film. They work through physical action rather than chemical toxicity.
Follow product mixing instructions carefully. Over-concentration can damage plants.
Spray thoroughly during cooler parts of the day. Oils can burn leaves if applied in heat or direct sun.
The oil coating suffocates mites and prevents eggs from hatching. This dual action makes it very effective.
Apply weekly for a month. Multiple applications ensure you catch all life stages.
Horticultural oil leaves slight residue. Wipe leaves gently after the oil dries to restore shine.
Diatomaceous Earth
Food-grade diatomaceous earth (DE) consists of microscopic fossilized algae with sharp edges. These cut through mite exoskeletons, causing dehydration.
Dust dry DE on soil surface and lower stems. Avoid getting it on leaves where it looks unsightly.
Reapply after watering as moisture reduces effectiveness.
DE works best as a barrier preventing mites from traveling between plants. It’s less effective on established leaf infestations.
Always use food-grade DE, not pool-grade which contains harmful additives.
Wear a mask when applying. The fine dust irritates lungs if inhaled.
Treatment Application Tips
Proper technique makes treatments more effective while protecting your plants.
Timing Applications
Treat in the evening after sun intensity decreases. This prevents light-magnified burning from wet leaves and oil residues.
Consistent timing matters more than specific hours. Regular intervals ensure you catch mites at all life stages.
Avoid treating during heat waves. High temperatures stress plants already struggling with mite damage.
Weekly treatments work for most methods. More frequent applications may stress plants unnecessarily.
Thorough Coverage
Spray until solution drips from leaves. Incomplete coverage leaves surviving mites to rebuild populations.
Leaf undersides are critical. This is where 90% of mites hide and reproduce.
Don’t forget stems, leaf joints, and new growth. Mites hide in any protected crevice.
Lift drooping leaves to spray underneath. Mites cluster in these hidden areas.
Move plants outside for treatment when possible. This makes thorough spraying easier and prevents mess indoors.
Quarantine Procedures
Isolate infested plants immediately. Spider mites crawl between touching plants and spread rapidly.
Keep quarantined plants at least 3 feet from other plants. This distance prevents casual spread.
Treat all plants that were near the infested specimen. Even if they don’t show symptoms, they likely have mites.
Monitor quarantined plants for 4-6 weeks after treatment appears successful. Hidden mites can re-emerge from eggs.
I’ve learned to quarantine at the first sign of trouble. Treating one plant is much easier than treating ten.
Preventing Future Infestations
Prevention is far easier than treatment. These practices dramatically reduce spider mite problems.
Humidity Management
Increase humidity above 50% to deter spider mites. They struggle to reproduce in moist conditions.
Use humidifiers near plant collections. This is the most effective prevention method.
Group plants together to create humid microclimates. Plants naturally increase humidity through transpiration.
Pebble trays provide localized humidity. Fill trays with pebbles and water, place pots on top without touching water.
Regular misting helps temporarily but isn’t sufficient alone. The humidity boost only lasts an hour or two.
Since keeping my plant room at 55-60% humidity, spider mite problems dropped by 90%. This single change made the biggest difference.
Regular Plant Inspection
Check plants weekly during warm, dry weather. Early detection prevents small problems from becoming infestations.
Focus on new plants and known susceptible varieties. These need extra attention.
Use magnifying glass or phone zoom to inspect leaf undersides. Catch mites before they become visible to naked eye.
Look for stippling, webbing, or dull leaf appearance. These early signs allow intervention before serious damage.
Make inspection part of your watering routine. Thorough checking takes just a few extra minutes.
Air Circulation
Good air movement disrupts spider mite activity. Stagnant air allows them to thrive undisturbed.
Use small fans to keep air moving gently. This doesn’t need to be strong – just enough to prevent still pockets.
Avoid crowding plants together. Adequate spacing improves air flow around each specimen.
Open windows when weather permits. Fresh air and natural breezes deter many pests.
Plant Health Maintenance
Healthy plants resist pests better than stressed ones. Proper care is your first defense.
Water consistently without overwatering. Both extremes stress plants and attract mites.
Provide appropriate light for each species. Light-stressed plants become vulnerable.
Fertilize moderately. Over-fertilized plants produce succulent growth that mites find irresistible.
Avoid drought stress. Dry plants are spider mite magnets because the pests thrive in dry conditions.
New Plant Quarantine
Always quarantine new plants for 2-3 weeks. Most indoor infestations arrive on purchased plants.
Inspect new plants thoroughly before bringing them home. Check for any signs of pests or disease.
Keep new arrivals isolated from your collection. This prevents introducing pests to established plants.
Treat preventatively if any concerns exist. A prophylactic spray with insecticidal soap provides peace of mind.
I’ve prevented countless infestations by maintaining strict quarantine practices. It’s tedious but absolutely worth it.
When to Escalate Treatment
Sometimes natural methods aren’t enough. Knowing when to take additional action prevents losing plants.
Signs Treatment Isn’t Working
If mite populations don’t decrease after three weeks of treatment, escalate your approach.
Webbing increases despite treatments. This indicates reproduction outpaces your control efforts.
New damage appears faster than plants can recover. The population is growing despite interventions.
Multiple plants show spreading infestations. This suggests treatment isn’t containing the problem.
Combination Approaches
Use multiple treatment methods simultaneously. Combining water spray, soap, and neem oil attacks mites from several angles.
Rotate treatments to prevent resistance development. Use soap one week, neem the next, alcohol the third week.
Increase treatment frequency to every 3-4 days. More aggressive schedules may overwhelm reproduction rates.
Professional Options
Consider horticultural oils or stronger organic pesticides if natural methods fail after six weeks.
Predatory mites offer biological control. These beneficial species eat spider mites without harming plants.
Professional pest control can help with severe infestations. Some companies specialize in organic treatments.
When to Discard Plants
Sometimes plants are too far gone to save. Heavily infested plants with severe damage may not recover.
If a plant is 70% damaged and treatment isn’t working, discard it. Saving one plant isn’t worth risking your entire collection.
Dispose of infested plants in sealed bags. Don’t compost them or leave them where mites could spread.
I’ve had to throw away beloved plants when treatment failed. It’s heartbreaking but sometimes necessary to protect the rest.
Specific Plant Considerations
Different plants need modified treatment approaches based on their characteristics.
Fuzzy-Leaved Plants
African violets, begonias, and similar plants with hairy leaves can’t handle water spray or heavy wetting.
Use alcohol spray very lightly or apply neem oil carefully. Test on hidden areas first.
Cotton swabs dipped in alcohol can spot-treat visible mites without soaking leaves.
Prevention through humidity control is especially important for these plants.
Succulents and Cacti
These plants tolerate drier conditions naturally but can still get spider mites.
Water spray works well without risk of rot. Succulents handle wet leaves better than frequent watering.
Alcohol spray is very effective on these hardy plants. They tolerate it better than most species.
Increase watering slightly during treatment. This temporarily changes the dry environment mites prefer.
Large Plants
Floor plants and large specimens are difficult to treat thoroughly.
Take them to the shower if possible. If not, use a pump sprayer for better coverage.
Focus on systematic, thorough treatment rather than quick fixes. Large plants need more time and solution.
Consider treating outdoors during warm weather. This allows aggressive spraying without indoor mess.
Long-Term Spider Mite Management
Successful control requires ongoing vigilance, not just treating active infestations.
Monitoring Schedule
Inspect plants weekly year-round. Monthly checks might miss early infestations.
Increase inspection frequency during hot, dry weather. These conditions favor rapid mite reproduction.
Keep notes on which plants have had issues. Previous problem plants need extra attention.
Environmental Optimization
Maintain 50-60% humidity whenever possible. This single factor prevents most problems.
Keep temperatures moderate. Mite reproduction slows in cooler conditions (65-75°F).
Ensure good air circulation without creating drafts that stress plants.
Building Resistance
Healthy plants resist mites better. Focus on optimal care for each species.
Avoid stress from underwatering, overwatering, or inappropriate light.
Well-cared-for plants bounce back faster even if mites appear.
Conclusion
Getting rid of spider mites naturally requires persistence, but it’s completely achievable. The key is early detection combined with consistent treatment and prevention.
Start treatment immediately at the first sign of infestation. Those tiny yellow dots on leaves signal time to act, not wait.
Use combination approaches for best results. Water spray plus insecticidal soap plus humidity increases attacks mites from multiple angles.
Don’t give up after one or two treatments. Spider mite elimination requires 3-4 weeks of consistent applications to catch all life stages.
Prevention through humidity control is your best long-term strategy. Keeping humidity above 50% eliminates most spider mite problems before they start.
My plant collection has been virtually spider-mite-free for two years thanks to these practices. The combination of weekly inspections, high humidity, and immediate treatment of any signs has transformed my pest management.
Take action on any infestations today. The longer you wait, the harder they become to control. Your plants will thank you for the effort.
Happy Planting, Jasmine


