I stood in the store staring at a ceramic pot. Twelve dollars. For a simple, plain container. I needed five pots. That’s sixty dollars just for boring vessels to hold dirt.
I walked out empty-handed. Annoyed. There had to be a better way.
At home, I looked around my apartment. An old coffee mug with a broken handle. Tin cans from dinner. A wine bottle I’d saved for “someday.” Mason jars stacked in the cabinet.

What if I just… made my own pots?
That weekend, I drilled drainage holes in the mug. Painted tin cans copper. Cut the wine bottle. Created five unique planters for under ten dollars total. They looked better than the store pots. More personality. Actually interesting.
Three years later, I still haven’t bought a traditional pot. My apartment is filled with creative DIY planters. Each one tells a story. Cost almost nothing. And guests always ask where I got them.
This guide shows you 15 DIY plant pot ideas. From simple (10 minutes) to complex (weekend project). Using materials you already own. Or can get for pennies.
No special skills required. Just creativity and a willingness to experiment.
Before You Start: Essential Basics
Every DIY pot needs certain elements. Get these right first.
Drainage Is Non-Negotiable
Plants need drainage holes. Period. Water must escape. Sitting water causes root rot.
For materials you can drill:
- Use masonry bit for ceramic/concrete
- Metal bit for tin/aluminum
- Regular drill bit for wood
- Go slow and steady
- Start with small hole, enlarge if needed
- 1-3 holes per pot
For materials you can’t drill: Create drainage layer instead:
- 1-2 inches pebbles at bottom
- Add activated charcoal layer
- Use well-draining soil
- Water very sparingly
- Monitor closely for overwatering
But drilling is always better. Always.
Size Matters
Too small: Roots get cramped. Plants suffer.
Too large: Soil stays wet too long. Roots rot.
Just right: 1-2 inches larger than root ball.
Match pot size to plant size. Baby plant needs small pot. Large plant needs large pot.
Weight Considerations
Heavy pots (concrete, ceramic, glass):
- Stable for tall plants
- Hard to move
- Good for permanent placement
Light pots (fabric, plastic, wood):
- Easy to move
- May tip over with tall plants
- Good for rearranging
Consider where pot will live. Permanent or mobile?
Safety First
When drilling:
- Wear safety glasses
- Work in ventilated area
- Clamp material securely
- Start with pilot hole
- Keep drill perpendicular
When cutting:
- Use appropriate tool
- Protect hands
- Work on stable surface
- Keep sharp tools away from edges
When painting:
- Use non-toxic paints
- Work outside or in ventilated space
- Let dry completely before planting
- Check if paint is plant-safe
Material Selection
Safe materials:
- Ceramic and terracotta
- Glass (sealed edges)
- Food-grade plastic
- Untreated wood
- Fabric
- Metal (painted or sealed)
Avoid:
- Treated wood (chemicals)
- Lead-based paints
- Plastics marked 3, 6, or 7
- Materials that degrade quickly
Beginner Projects (Under 30 Minutes)
Start here if you’re new to DIY. Simple projects with impressive results.
1. Painted Terracotta Pots
Transform boring terracotta into art pieces.
Materials:
- Plain terracotta pots ($1-3 each)
- Acrylic paint
- Paintbrushes
- Sealer (optional)
Process:
- Clean pot thoroughly
- Let dry completely
- Paint base coat (2 coats usually)
- Let dry between coats
- Add designs, patterns, or leave solid
- Paint rim different color for contrast
- Seal with acrylic sealer for durability
Design ideas:
- Geometric patterns
- Ombre gradients
- Splatter paint
- Stripes or polka dots
- Gold leaf accents
- Chalkboard paint (label varieties)
Time: 20 minutes plus drying Cost: $2-5 per pot
I painted twenty pots in assembly-line style. One afternoon. They’re still beautiful three years later.
2. Decorated Tin Cans
Upcycle food cans into industrial-chic planters.
Materials:
- Empty tin cans (clean, labels removed)
- Spray paint or acrylic paint
- Drill with metal bit
- Sandpaper
Process:
- Remove labels completely
- Wash and dry thoroughly
- Sand any sharp edges smooth
- Drill 3-5 drainage holes in bottom
- Paint exterior (2-3 coats)
- Let dry completely
- Add decorative elements if desired
Variations:
- Copper or gold spray paint (trendy)
- Wrapped in twine or rope
- Decoupage with fabric or paper
- Leave unpainted for minimalist look
- Group different sizes together
Time: 15 minutes plus drying Cost: Free (use cans you’d recycle)
Pro tip: Larger cans (coffee, formula) work better than small soup cans.
3. Mug Planters
Broken handle? Chipped rim? Perfect plant pot.
Materials:
- Old mugs or teacups
- Masonry drill bit
- Small plants or succulents
Process:
- Place mug in container of water (reduces cracking)
- Drill slowly from inside bottom
- Start with small bit, enlarge as needed
- Go slow – ceramics crack easily
- Let dry completely
- Plant small specimens
Best for:
- Succulents
- Small cacti
- Baby plants
- Propagations
- Herbs
Time: 10 minutes Cost: Free (use what you own)
Display on windowsill. Or hang from hooks. Vintage teacups look especially charming.
4. Mason Jar Hanging Planters
Classic jars become trendy hanging gardens.
Materials:
- Mason jars (any size)
- Hose clamps or wire
- S-hooks
- Jute rope or chain
Process:
- Wrap hose clamp around jar neck
- Tighten securely
- Attach rope or chain to clamp
- Hang from hook or rod
- Add drainage layer (can’t drill glass easily)
- Plant with well-draining soil
Variations:
- Paint lids
- Wrap jars in twine
- Use different jar sizes
- Create clusters at varying heights
- Add fairy lights around jars
Time: 10 minutes per jar Cost: $1-2 per jar
Perfect for herbs in kitchens. Or trailing plants near windows.
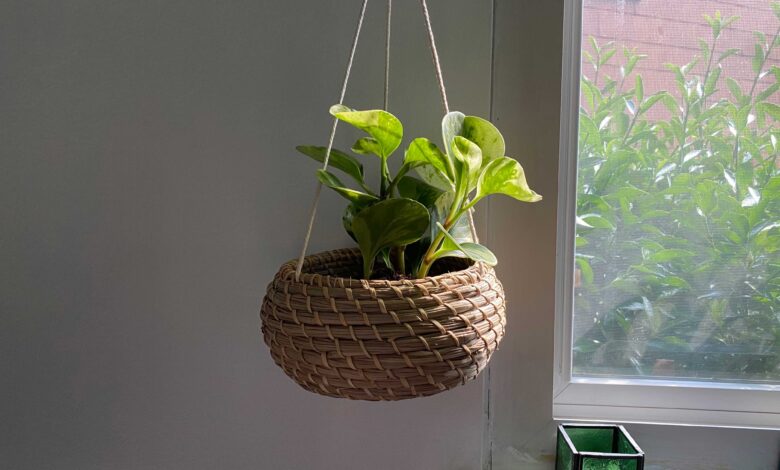
5. Woven Basket Planters
Add boho style instantly.
Materials:
- Woven baskets (thrift stores, $1-5)
- Plastic liner or trash bag
- Scissors
Process:
- Line basket with plastic
- Cut drainage slits in plastic
- Fill with potting mix
- Plant directly in lined basket
- Tuck plastic edges under soil
Options:
- Use baskets as-is (natural look)
- Paint or dye baskets
- Add handles with rope
- Mix basket sizes and styles
- Layer baskets (large inside larger)
Time: 5 minutes Cost: $1-5
No drilling required. Switch out plastic liner if it deteriorates.
Intermediate Projects (1-2 Hours)
Ready for more involved projects? These require more time but create stunning results.
6. Concrete Geometric Planters
Modern, minimalist, surprisingly easy.
Materials:
- Concrete mix
- Two containers (one larger, one smaller)
- Cooking oil spray
- Plastic cup (for drainage hole)
- Sandpaper
Process:
- Spray containers with oil (prevents sticking)
- Mix concrete per instructions
- Pour 1 inch into large container
- Place plastic cup upside-down for drainage hole
- Center small container inside large
- Pour concrete between containers
- Tap to remove air bubbles
- Let cure 24-48 hours
- Remove from molds
- Sand rough edges smooth
Tips:
- Use geometric molds (cube, pyramid)
- Add color with concrete dye
- Create texture with leaves pressed in
- Make multiple sizes
- Seal for weather resistance
Time: 1 hour plus curing Cost: $5-10 for multiple pots
These look incredibly expensive. Cost pennies to make.
7. Wood Planter Boxes
Classic cedar boxes for herbs or flowers.
Materials:
- Cedar boards (naturally rot-resistant)
- Wood screws
- Drill
- Saw
- Sandpaper
- Wood glue (optional)
Process:
- Cut boards to size (4 sides, 1 bottom)
- Sand all pieces smooth
- Drill pilot holes for screws
- Assemble sides with screws
- Attach bottom piece
- Drill drainage holes in bottom
- Sand any rough spots
- Optional: stain or paint exterior
- Line interior with plastic (with drainage slits)
Variations:
- Window box style (long, narrow)
- Raised bed mini versions
- Tiered boxes
- Add legs or stands
- Decorative corner brackets
Time: 2 hours Cost: $10-20 depending on size
Cedar weathers beautifully. Lasts years outdoors.
8. Rope-Wrapped Plastic Pots
Transform ugly plastic into textured beauties.
Materials:
- Plastic pots
- Thick rope or twine (jute, sisal, cotton)
- Hot glue gun
- Scissors
Process:
- Start at bottom of pot
- Apply hot glue in sections
- Wrap rope tightly around pot
- Continue spiraling upward
- Keep rows tight together
- Glue end securely at top
- Trim any excess
Variations:
- Ombre effect (dye rope gradually)
- Two-tone (alternate rope colors)
- Diagonal wrapping pattern
- Add painted rim
- Leave drainage holes visible
Time: 1 hour per pot Cost: $3-8 per pot
Hides cheap plastic completely. Looks expensive and handmade.
9. Fabric Grow Bags
Breathable, flexible, portable planters.
Materials:
- Heavy canvas or burlap
- Scissors
- Sewing machine or heavy-duty needle
- Thread
Process:
- Cut fabric to size (cylinder when sewn)
- Sew side seam
- Fold and sew bottom
- Reinforce all seams (double stitch)
- Fold top edge over and sew (creates rim)
- Optional: add handles
Benefits:
- Breathable (prevents root rot)
- Portable
- Folds flat for storage
- Air prunes roots naturally
- Machine washable
Time: 1 hour per bag Cost: $2-5 per bag
Perfect for vegetables and larger plants. Professionals use these.
10. Wine Bottle Self-Watering System
Elegant solution for vacation watering.
Materials:
- Empty wine bottles
- Bottle cutter tool
- Sandpaper
- Cork or terracotta cone
Process:
- Clean bottle thoroughly
- Cut bottle near bottom (YouTube tutorials help)
- Sand cut edge completely smooth
- Flip top portion upside-down into bottom
- Fill top reservoir with water
- Water slowly drips into soil
Variations:
- Keep bottle whole, insert into soil
- Cut decoratively (angled, spiral)
- Paint bottle exterior
- Etch designs
- Use colored glass
Time: 1 hour Cost: Free + $10 for bottle cutter
Looks beautiful and functional. Great conversation piece.
Advanced Projects (Half Day+)
Weekend warrior projects. Complex but incredibly rewarding.
11. Hypertufa Stone Pots
Create faux-stone planters that age beautifully.
Materials:
- Portland cement
- Peat moss
- Perlite
- Water
- Two containers (mold and form)
- Plastic sheet
- Wire brush
Process:
- Mix 1 part cement, 1 part peat, 1 part perlite
- Add water until consistency of cottage cheese
- Line large container with plastic
- Press 2-inch layer of mix in bottom
- Center smaller container inside
- Fill space with hypertufa mix
- Pack firmly, eliminate air pockets
- Insert something for drainage hole
- Cover with plastic
- Cure 24-48 hours
- Remove from molds
- Let cure 1-2 weeks
- Wire brush for aged texture
Tips:
- Add color with cement dye
- Create texture while wet
- Moss grows naturally on these
- Weatherproof and durable
- Gets more beautiful with age
Time: 3 hours plus curing time Cost: $10-15 per pot
These look genuinely ancient. Incredibly satisfying to make.
12. Mosaic Tile Pots
Art-piece planters with stunning detail.
Materials:
- Plain terracotta pot
- Ceramic tiles or broken dishes
- Tile adhesive
- Grout
- Sponge
- Sealer
Process:
- Break tiles into small pieces (use towel and hammer)
- Plan design layout
- Apply adhesive to pot section
- Press tile pieces firmly
- Work in small sections
- Let adhesive dry 24 hours
- Mix and apply grout
- Wipe excess with damp sponge
- Let grout cure 24 hours
- Seal entire pot
Design ideas:
- Random pattern
- Geometric design
- Ombre color gradient
- Picture or scene
- Band around rim only
Time: 4-6 hours spread over 3 days Cost: $5-15 per pot
Heirloom quality. Could sell these at craft fairs.
13. Macramé Plant Hangers
Boho chic for hanging plants.
Materials:
- Macramé cord (6-8mm)
- Metal ring (3-inch)
- Scissors
- Measuring tape
Process:
- Cut 8 pieces of cord (8 feet each)
- Fold each in half
- Attach all to ring with lark’s head knots
- Separate into 4 groups (4 cords each)
- Tie square knots creating basket
- Work in rounds
- Create diamond pattern
- Gather all cords at bottom
- Tie finishing knot
- Trim tassels even
Variations:
- Simple or complex patterns
- Different cord colors
- Beads incorporated
- Varying lengths
- Spiral or twisted designs
Time: 2-4 hours (learning curve) Cost: $5-10 per hanger
YouTube tutorials essential for beginners. Once you learn, it’s addictive.
14. Vertical Pallet Garden
Maximize space with vertical growing.
Materials:
- Wooden pallet (free from stores/warehouses)
- Landscape fabric or plastic
- Staple gun
- Sandpaper
- Screws
- Wall brackets
Process:
- Sand pallet thoroughly
- Optional: paint or stain
- Attach fabric to back and bottom
- Create pockets between slats
- Fill pockets with soil
- Secure to wall vertically
- Plant in each pocket
- Water carefully (vertical means runoff)
Best plants for vertical:
- Succulents
- Herbs
- Strawberries
- Small flowers
- Trailing plants
Time: 4-6 hours Cost: $10-20
Stunning statement piece. Perfect for small spaces.
15. Kokedama (Japanese Moss Balls)
No pot at all – just soil and moss.
Materials:
- Bonsai soil or potting mix
- Peat moss
- Sheet moss
- Fishing line or twine
- Water
Process:
- Mix equal parts soil and peat
- Add water until moldable
- Form ball around plant roots
- Compact firmly
- Wrap completely with sheet moss
- Secure with fishing line (wrap many times)
- Tie off securely
- Hang or display on plate
Care:
- Soak in water when light/dry
- Let drain completely
- Mist between soakings
- Lasts 1-2 years before remaking
Time: 30 minutes per ball Cost: $3-5
Traditional Japanese art form. Incredibly unique display.
Display and Styling Ideas
Creating pots is half the fun. Displaying them is the other half.
Clustering
Group odd numbers (3, 5, 7) of pots together. Vary heights and sizes. Creates visual interest.
Color Coordination
Monochrome: All white, black, or gray pots. Plants provide color.
Complementary: Pots in colors opposite on color wheel. Bold statement.
Analogous: Pots in similar colors. Harmonious, calming.
Texture Mixing
Combine different materials and textures:
- Smooth ceramic with rough concrete
- Rustic wood with modern metal
- Glossy paint with matte finishes
Height Variation
Use plant stands, books, or boxes. Create levels. Prevents flat, boring arrangements.
Themed Collections
Vintage: Antique vessels, teacups, old containers Industrial: Metal, concrete, minimal Bohemian: Macramé, woven, colorful Minimalist: White, simple, clean lines Eclectic: Mix everything intentionally
Location-Specific
Kitchen: Herbs in mugs, tin cans, mason jars Bathroom: Moisture-loving plants in glass containers Bedroom: Calming colors, simple designs Living room: Statement pieces, conversation starters
Maintenance and Care
DIY pots need special considerations.
Regular Checks
Drainage functionality: Holes can clog. Clean periodically.
Material integrity: Wood rots. Fabric wears. Metal rusts. Monitor condition.
Paint condition: Touch up as needed. Reseal when weathered.
Structural stability: Check for cracks, breaks, weakness.
Seasonal Adjustments
Outdoor pots:
- Bring terracotta inside before frost
- Empty and store fabric pots
- Seal wood annually
- Drain all pots before freezing
Indoor pots:
- Rotate for even wear
- Clean exterior periodically
- Check drainage holes
- Replace liners as needed
When to Replace
Replace pots when:
- Drainage fails completely
- Material breaks down
- Size no longer appropriate
- Mold/mildew can’t be cleaned
- Structural integrity compromised
Good news: DIY pots cost little to replace. Make new ones easily.
Budget Breakdown
How much money you’ll actually save.
Store Prices
Basic plastic pot: $3-8 Ceramic pot: $10-30 Designer pot: $30-100+ Hanging planter: $15-40
For 10 plants: $150-500+
DIY Costs
Painted terracotta: $2-3 each Tin cans: Free Concrete pots: $1-2 each Wood boxes: $5-10 each Fabric bags: $2-4 each
For 10 plants: $20-50
Savings: $130-450
Plus satisfaction of creating something yourself.
Troubleshooting Common Problems
Issues and solutions for DIY projects.
Drainage Problems
Issue: Water pools on surface
Fix: Drill more/larger holes. Add drainage layer. Use better soil.
Cracking
Issue: Ceramic/concrete cracks
Fix: Drill more slowly. Use pilot holes. Let concrete cure fully. Apply sealer.
Paint Peeling
Issue: Paint flakes off
Fix: Prime surface first. Use outdoor paint. Seal with clear coat. Let dry completely between coats.
Material Degradation
Issue: Wood rots, fabric mildews
Fix: Seal wood annually. Use mildew-resistant fabric. Ensure proper drainage.
Size Mistakes
Issue: Pot too small or large
Fix: Repot in better size. Use as decorative cover. Repurpose for different plant.
Conclusion: Why DIY Wins
That sixty-dollar shopping trip three years ago taught me something. Store pots are overpriced. Boring. Generic.
DIY pots are cheaper. Unique. Exactly what you want.
The Real Benefits
Save money: Significantly. Hundreds of dollars over time.
Express creativity: Your style. Your colors. Your design.
Reduce waste: Upcycle items headed for trash or recycling.
Custom sizes: Make exactly what you need. Not what stores stock.
Quality control: You control materials and construction.
Satisfaction: Created something with your hands.
Conversation starters: Everyone asks about them.
Getting Started
Start simple:
- Pick one beginner project
- Gather materials
- Set aside 30 minutes
- Just start
- Don’t aim for perfection
My first painted pot was messy. Uneven. But I loved it. Still use it today.
Your DIY Journey
You don’t need artistic talent. Or special skills. Just willingness to try.
Start with painted terracotta. Or decorated tin cans. Build confidence. Then tackle more complex projects.
Before you know it, you’ll never buy store pots again. Your home will be filled with unique, handmade planters. Each one telling a story.
And you’ll save hundreds of dollars while creating something genuinely yours.
That’s the magic of DIY. Make something from nothing. Save money. Express yourself. And grow beautiful plants in containers you created.
Start today. Your first DIY planter awaits.


One Comment