I still remember the day I brought home my first peace lily. It sat on my coffee table looking elegant. The glossy leaves shined. Those pristine white blooms caught everyone’s attention. I felt like a real plant parent.
Within two weeks, everything changed. Those beautiful leaves were drooping dramatically. I panicked. I thought I’d already killed it.
That’s when I learned something important. Peace lilies are drama queens. They have a flair for the theatrical. That wilting? It’s just their way of saying “I’m thirsty.” Then they bounce back within hours of watering.
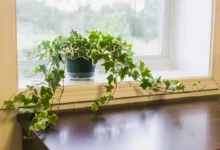

Five years later, that same peace lily is thriving. It blooms regularly. And it taught me a valuable lesson. Once you understand their communication style, these plants are incredibly rewarding and forgiving.
The peace lily (Spathiphyllum) has earned its reputation. It’s one of the best houseplants for beginners. And for good reason.
It tolerates low light better than most blooming plants. It clearly signals when it needs water. It purifies indoor air. And it looks elegant in any space.
Whether you’re a nervous beginner or experienced plant parent, this guide covers everything. You’ll learn how to keep your peace lily healthy and blooming.
Understanding Your Peace Lily
Let’s start with the basics. Understanding what makes peace lilies unique helps you care for them better.
Not Actually a Lily
Despite the name, peace lilies aren’t true lilies at all. They belong to the Araceae family. This family includes Pothos and Philodendrons too.
Peace lilies come from tropical rainforests. They grow naturally in Central and South America. In the wild, they thrive in filtered light on forest floors. This explains their excellent low-light tolerance.
The “Flowers” Aren’t Really Flowers
Those elegant white “blooms” everyone loves? They’re not actually flowers. They’re specialized leaves called spathes. These spathes surround the true flowers.
The real flowers are tiny. They form that bumpy spike in the center. That spike is called a spadix.
The white spathe gradually turns green as it ages. This is completely normal. It’s not a sign of problems.
The Dramatic Wilt
Peace lilies have an interesting survival strategy. They wilt dramatically when thirsty. In nature, this helps them conserve water during dry periods.
For plant parents, this provides a clear signal. You know exactly when to water. Don’t panic when you see drooping. Peace lilies recover remarkably fast. Usually within 2-4 hours of watering.
Growth Expectations
Most peace lily varieties reach 1-3 feet tall indoors. Some cultivars grow larger. ‘Sensation’ can reach 4-6 feet.
They produce new growth from the base. They don’t grow taller from existing stems. Mature plants bloom 2-3 times yearly. Usually in spring and fall.
With proper care, blooming happens regularly.
Light Requirements: Why “Low Light” is Misleading
Peace lilies tolerate low light. But there’s a crucial difference between “tolerate” and “thrive.”
What They Actually Need
Peace lilies perform best in medium to bright indirect light. They’ll survive in low light conditions. But growth slows dramatically. Blooming becomes rare or stops entirely.
Think of low light tolerance as emergency survival mode. Not optimal conditions.
Ideal Placement
Here are the best spots for your peace lily:
- 5-8 feet from a bright window
- In a room with large windows (not directly in front)
- North-facing windows (Northern Hemisphere)
- East-facing windows with morning sun
- Behind sheer curtains filtering bright light
How Light Affects Your Plant
Light determines several important factors:
Blooming frequency: Brighter indirect light triggers more frequent flowering. Low light plants rarely bloom.
Leaf color: Optimal light produces deep green, glossy leaves. Too little light causes pale, yellowing foliage.
Growth rate: Medium-bright light supports steady new growth. Low light dramatically slows development.
Recognizing Light Problems
Too little light causes:
- No blooms despite mature plant
- Pale, yellowish leaves
- Very slow or no new growth
- Leggy, stretched appearance
Too much direct light causes:
- Brown, crispy patches on leaves (sunburn)
- Bleached, faded coloring
- Leaves curling inward
The Fix
If your peace lily hasn’t bloomed in 6+ months, light is likely the problem. This applies to mature plants only.
Move it closer to a window. But keep it out of direct sun. Wait 2-3 months for results.
Watering: Reading the Drama Queen’s Signals
Peace lilies are unique. They tell you exactly when they need water. You just need to learn their language.
The Wilting Method (Easiest for Beginners)
This is the simplest approach. Wait for your peace lily to show slight drooping. The leaves lose their perky, upright position. They begin to sag.
Water thoroughly at this point. The plant will recover within 2-4 hours. This teaches you its exact watering schedule.
Important note: Don’t let it wilt dramatically every single time. Occasional wilting is fine. It’s helpful for learning. But consistent severe wilting stresses the plant unnecessarily.
The Finger Test (More Proactive)
Insert your finger 1-2 inches into the soil. If it feels dry at this depth, water thoroughly. If any moisture remains, wait another day or two.
This prevents wilting. But it still avoids overwatering.
Proper Watering Technique
Follow these steps for best results:
- Water thoroughly until water flows from drainage holes
- Let excess water drain completely (5-10 minutes)
- Empty saucer so plant never sits in standing water
- Use room-temperature water (cold water can shock roots)
Water Quality Matters
Peace lilies are sensitive to chemicals. Tap water contains fluoride and chlorine. These cause brown leaf tips.
Best water options:
- Filtered water
- Distilled water
- Rainwater
- Tap water that’s sat uncovered for 24 hours
The 24-hour wait lets chlorine dissipate.
Watering Frequency
This varies dramatically. Light, humidity, temperature, and season all affect it.
Spring/Summer: Every 5-7 days typically Fall/Winter: Every 10-14 days typically
Always check soil moisture. Don’t follow a rigid schedule.
Common Watering Mistakes
Overwatering is more dangerous than underwatering.
Overwatering causes:
- Yellow leaves
- Mushy brown stems
- Root rot
- Fungus gnats
- Plant wilting despite wet soil
Underwatering is easy to fix.
Underwatering causes:
- Dramatic drooping
- Brown, crispy leaf edges
- Soil pulling away from pot sides
Humidity: Creating Comfortable Conditions
Peace lilies come from tropical rainforests. They appreciate higher humidity than most homes provide naturally.
Ideal Range
50-60% relative humidity produces best results. They tolerate 40-50% found in typical homes. Below 40%, you’ll notice stress symptoms.
Signs of Low Humidity
Watch for these indicators:
- Brown, crispy leaf tips and edges
- Leaf edges curling inward
- Flower bracts browning prematurely
- Overall slow growth
Increasing Humidity
Humidifier (Most Effective): A small humidifier near your peace lily provides consistent moisture. Run it during growing season especially. That’s spring and summer.
Pebble Tray: Fill a tray with pebbles and water. Place the pot on top. Not in the water. Evaporation increases local humidity.
Grouping Plants: Multiple plants together create a humid microclimate. Their combined transpiration does this naturally.
Bathroom Placement: If your bathroom has a window, it’s perfect. Showers create natural humidity.
Misting: This is less effective than other methods. But misting leaves once daily helps. Do it in the morning. Foliage needs to dry before night.
Soil and Potting: The Foundation
Soil quality directly impacts watering success. It also affects root health.
Ideal Soil Characteristics
Peace lilies need soil that:
- Drains well but retains some moisture
- Contains organic matter
- Stays loose and aerated
- Has slightly acidic pH (5.5-6.5)
Recommended Soil Mix
Option 1 – Simple:
- 70% quality potting soil
- 20% perlite
- 10% peat moss or coco coir
Option 2 – Premium:
- 50% potting soil
- 25% perlite
- 15% orchid bark (small pieces)
- 10% worm castings
Why These Ingredients
Potting soil provides base structure and nutrients.
Perlite improves drainage. It prevents compaction.
Peat moss/coco coir retains moisture while staying aerated.
Orchid bark adds chunky texture. This creates air pockets.
Worm castings provide slow-release nutrients.
Pot Selection
Your pot needs three things:
- Must have drainage holes (this is non-negotiable)
- Size: 1-2 inches larger than root ball when repotting
- Material choice: Plastic retains moisture longer. Terracotta dries faster.
Fertilizing: Supporting Growth and Blooms
Proper fertilization encourages vigorous growth. It also promotes more frequent flowering.
Feeding Schedule
Growing Season (Spring-Summer): Feed every 4-6 weeks with diluted liquid fertilizer.
Dormant Season (Fall-Winter): Reduce to every 8-12 weeks. Or stop entirely.
Fertilizer Type
Use balanced houseplant fertilizer. Look for 20-20-20 or 10-10-10 NPK ratio. Dilute to half the recommended strength.
Peace lilies are light feeders. More isn’t better.
Application Steps
- Always water before fertilizing (prevents root burn)
- Apply diluted fertilizer to moist soil
- Water again lightly after application
Signs of Fertilizer Issues
Under-fertilization causes:
- Slow growth
- Small new leaves
- No blooms despite adequate light
Over-fertilization causes:
- Brown leaf tips despite good water quality
- White salt crust on soil surface
- Wilting despite proper watering
The Fix
If you see salt buildup, flush the soil. Water thoroughly until water runs clear from drainage holes. Repeat this process 2-3 times. This removes accumulated salts.
Encouraging Blooms: Getting Those White Flowers
Many peace lily owners struggle to get blooms. Here’s how to trigger flowering.
Requirements for Blooming
1. Adequate Light (Most Important)
Peace lilies bloom in response to light levels. Low light means no blooms. This is true regardless of other care.
Move to brighter indirect light if needed. This applies if your mature plant hasn’t bloomed in 6+ months.
2. Plant Maturity
Young peace lilies don’t bloom. Plants need to be 12-18 months old. They also need at least 3-4 leaves before flowering capability develops.
3. Proper Nutrition
Regular fertilization during growing season provides energy. This energy is needed for bloom production.
4. Slight Drying Between Waterings
Mild water stress can trigger blooming. Let the plant show very slight wilt before watering. But don’t stress it severely.
5. Temperature Consistency
Maintain 65-80°F (18-27°C) consistently. Avoid cold drafts. Avoid temperature swings.
Bloom Maintenance
Once blooms appear, they last 4-8 weeks. The white spathe turns green as it ages. This is normal aging.
Cut the entire flower stem at the base. Do this once it’s fully green. Or when you want to remove it.
Realistic Expectations
Even with perfect care, peace lilies bloom 2-3 times yearly. Not constantly. They need rest periods between blooming cycles.
Cleaning and Maintenance
Regular maintenance keeps your peace lily looking its best.
Leaf Cleaning
Dust accumulation blocks light absorption. It reduces photosynthesis. Clean leaves monthly using this method:
- Support leaf from underneath with one hand
- Gently wipe with damp cloth or soft sponge
- Use plain water (no leaf shine products)
- Clean both top and bottom surfaces
Pruning
Remove dead or yellowing leaves at the base. Use clean scissors or pruning shears. This redirects energy to healthy growth.
When to prune:
- Yellow or brown leaves
- Dead or dying foliage
- Spent flower stems (cut at base)
- Damaged leaves
Shower Method
Every 1-2 months, give your peace lily a lukewarm shower. Use your bathtub for this.
This deep cleans leaves. It increases humidity temporarily. It rinses dust from soil surface.
Let the plant drain completely before returning to its spot.
Repotting: Knowing When and How
Peace lilies signal when they need repotting.
Signs It’s Time
Look for these indicators:
- Roots growing through drainage holes
- Water draining through extremely fast (root-bound)
- Growth has slowed despite good care
- Plant becomes top-heavy and tips over
- 18-24 months since last repotting
Best Timing
Repot in early spring. March-May is ideal. This is the start of growing season.
Repotting Process
Step 1: Choose the Right Pot
Select a pot 1-2 inches larger in diameter than current pot. Bigger isn’t better. Oversized pots hold too much water. This increases root rot risk.
Step 2: Prepare Fresh Soil
Use the recommended soil mix described earlier.
Step 3: Water the Day Before
This makes root ball removal easier. It also reduces transplant shock.
Step 4: Remove Plant Gently
Tip pot sideways and slide plant out. If stuck, run a knife around the edge. Or gently squeeze flexible pots.
Step 5: Inspect and Trim Roots
Check roots for health. Remove any brown, mushy, or foul-smelling roots. Use sterilized scissors for this.
Healthy roots are white or tan. They’re firm.
Step 6: Plant at Same Depth
Place in new pot at the same soil level as before. Fill around root ball with fresh soil. Gently firm to eliminate air pockets.
Step 7: Water Thoroughly
Water until drainage flows freely. This settles soil around roots.
Step 8: Expect Adjustment Period
Some drooping or yellowing for 1-2 weeks is normal. The plant is adjusting. Avoid fertilizing for 4-6 weeks post-repotting.
Common Problems and Solutions
Quick problem identification prevents minor issues from escalating.
Yellow Leaves
Causes:
- Overwatering (most common—check if soil stays soggy)
- Natural aging (lower old leaves only)
- Chlorine/fluoride in tap water
- Too much direct sunlight
Solution: Adjust watering frequency. If only 1-2 lower leaves yellow, remove them. This is normal aging. New growth should look healthy.
Switch to filtered water if tips are brown too.
Brown Leaf Tips and Edges
Causes:
- Water quality (fluoride, chlorine, salts)
- Low humidity
- Over-fertilization
- Inconsistent watering
Solution: Switch to filtered or distilled water. Increase humidity with humidifier.
Flush soil if fertilizer buildup is suspected. Maintain consistent watering schedule.
No Blooms
Cause: Insufficient light is the primary reason.
Solution: Move to significantly brighter indirect light. Ensure plant is mature. That means 12+ months old. Fertilize regularly during growing season.
Drooping Leaves
Causes:
- Needs water (most common and easy fix)
- Root rot from overwatering
- Temperature shock
- Transplant stress
Solution: Check soil moisture first. If dry, water thoroughly. The plant will recover in 2-4 hours.
If wet and drooping, suspect root rot. Check roots. Repot if necessary.
Brown Spots on Leaves
Causes:
- Fungal disease (from overwatering or poor air circulation)
- Cold damage
- Pest damage
Solution: Remove affected leaves. Improve air circulation. Ensure proper watering. Not too frequent.
Check for pests on leaf undersides.
Pests
Peace lilies occasionally attract pests:
Spider mites: Tiny pests causing stippled yellowing and fine webbing.
- Treatment: Spray with insecticidal soap. Increase humidity.
Mealybugs: White cottony masses in leaf crevices.
- Treatment: Remove with rubbing alcohol on cotton swab. Follow with neem oil.
Scale: Brown bumps on stems and leaves.
- Treatment: Scrape off manually. Spray with neem oil.
Root Rot (Serious)
Symptoms:
- Yellowing leaves throughout plant
- Mushy, black stem base
- Foul soil odor
- Wilting despite wet soil
Treatment:
- Remove from pot immediately
- Cut away all brown, mushy roots
- Repot in fresh, dry soil in clean pot
- Water sparingly until new growth appears
Prevention: Use well-draining soil. Practice proper watering. Never let plant sit in water.
Peace Lily Varieties
The common peace lily is most popular. But several cultivars offer different sizes and characteristics.
Spathiphyllum ‘Sensation’: This is the largest variety. It reaches 4-6 feet tall. Creates dramatic presence. Has larger leaves and flowers.
Spathiphyllum ‘Mauna Loa’: This is medium size. Grows 2-3 feet. Frequent bloomer. Classic appearance.
Spathiphyllum ‘Domino’: This is a variegated variety. Has white-splashed leaves. Same care as standard. But needs slightly brighter light.
Spathiphyllum ‘Petite’: This is compact. Only 8-12 inches. Perfect for small spaces. Same care requirements.
Spathiphyllum ‘Wallisii’: This is a dwarf variety. Grows 12-15 inches. Frequent bloomer. Ideal for desks.
All varieties share the same basic care requirements. Size is the main difference.
Propagation: Creating New Plants
Peace lilies propagate through division. Not through cuttings.
Best Timing
Propagate during repotting in spring. The plant is actively growing then.
Division Process
Step 1: Remove from Pot
Water the day before for easier removal. Gently remove the plant. Shake off excess soil.
Step 2: Identify Natural Divisions
Look for natural separations in the root clump. Individual plants have formed there. Peace lilies grow in clusters. You’re separating these individual crowns.
Step 3: Separate Gently
Carefully pull or cut divisions apart. Each section needs:
- At least 2-3 leaves
- Healthy root system attached
- One growth point (crown)
Step 4: Plant Divisions
Pot each division in appropriate-sized container. Use fresh soil mix.
Don’t use oversized pots. Choose pots that fit the root mass. Leave 1 inch of space around edges.
Step 5: Water and Care
Water thoroughly after planting. Keep in medium indirect light.
Expect some drooping for 1-2 weeks. Divisions are adjusting. New growth indicates successful establishment.
Success Rate
Division is highly successful for peace lilies. You’re separating existing plants. Not propagating from cuttings.
Toxicity Warning
Important: Peace lilies are toxic to cats, dogs, and humans if ingested. They contain calcium oxalate crystals. These cause mouth and throat irritation. Also drooling, vomiting, and difficulty swallowing.
Symptoms of Ingestion
- Oral irritation and burning
- Excessive drooling
- Difficulty swallowing
- Vomiting
Safety Measures
- Keep out of reach of children and pets
- Wash hands after handling
- Seek medical attention if ingestion occurs
- Seek veterinary attention for pets
While not as toxic as some plants, they’re still dangerous. Never consider them safe for curious pets or children.
Conclusion: Your Peace Lily Success Plan
Peace lilies have earned their reputation. They’re excellent houseplants for good reason.
Once you understand their dramatic wilting, everything becomes easier. Provide medium-bright indirect light. They’re remarkably forgiving and rewarding.
The Essentials for Success
- Medium to bright indirect light for growth and blooms (not deep shade)
- Water when soil feels dry 1-2 inches down or shows slight wilt
- Filtered or distilled water to prevent brown leaf tips
- Moderate humidity (50-60% ideal) with occasional misting
- Light fertilization every 4-6 weeks during growing season
- Well-draining soil that retains some moisture
That dramatic wilt that scared me with my first peace lily? Now I see it differently. It’s helpful communication. Not crisis.
These plants literally tell you when they need water. Then they bounce back quickly. This rewards your attention.
Getting Started
Start with these fundamentals. Observe your plant’s responses. Adjust accordingly.
Pay attention to that wilting pattern. It teaches you your specific plant’s exact watering schedule. This works better than any rigid calendar.
Whether you’re a nervous beginner or experienced plant parent, peace lilies offer the perfect combination. Low-maintenance care. Air-purifying benefits. Elegant appearance. And enough personality to keep things interesting.
Give yours the light and water it needs. It’ll reward you with glossy foliage. And those pristine white blooms for years to come.
My Peace Lily Today
My five-year-old peace lily now sits in my home office. It produces blooms like clockwork. Every spring and fall.
Its dramatic wilts no longer cause panic. They simply remind me it’s time to water. That’s the relationship you’ll develop with yours too.
One based on clear communication. Mutual understanding. Not guesswork and anxiety.