
So you want to talk about spider plants? Let’s get down to business! If there’s one houseplant that practically takes care of itself while looking absolutely fabulous, it’s the spider plant. These cascading beauties have been gracing homes since your grandma’s era, and honestly? They’re still killing it.
With those arching striped leaves and adorable baby plantlets dangling like spiders on a web (hence the name), Chlorophytum comosum is basically the gateway plant that gets people hooked on houseplants. And the best part? They’re nearly impossible to kill.
What is a Spider Plant?
Spider plants are herbaceous perennial plants native to tropical and southern Africa. In their natural habitat, these guys grow as ground cover in forests and grasslands. They’ve adapted to be incredibly resilient, which is why they’re such rockstars as houseplants.
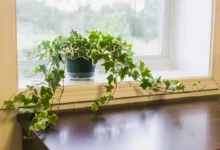
The plant gets its common name from those spider-like plantlets, called spiderettes or pups, that dangle from long stems called stolons. It’s like the plant is constantly making babies and showing them off. Pretty cool reproductive strategy if you ask me.
Chlorophytum comosum belongs to the Asparagaceae family, and while they might look delicate with those thin, ribbon-like leaves, these plants are tough as nails. They tolerate neglect, bounce back from mistakes, and reward you with fast growth and endless propagation opportunities.
In the wild, spider plants can bloom small white flowers on those long stems before producing plantlets. Indoors, flowering is less common but definitely possible with the right care. Even without flowers, those gracefully arching leaves and trailing babies make spider plants absolute showstoppers in hanging baskets or on plant shelves.
Spider Plant Varieties You’ll Love
While the classic green and white striped spider plant is most common, there’s actually some nice variety in the Chlorophytum world. Let me break down the popular types:
Chlorophytum Comosum ‘Vittatum’ – The classic spider plant with green leaves and a white or cream stripe down the center. This is what most people picture when they think “spider plant.” Super common and super easy to find.
Chlorophytum Comosum ‘Variegatum’ – Reverse coloring from Vittatum. These have white or cream edges with a green center stripe. Just as easy to care for and equally stunning.
Chlorophytum Comosum ‘Bonnie’ – The curly spider plant! Leaves curl and spiral instead of growing straight. Compact growth habit makes it perfect for smaller spaces. Same care as regular spider plants but with that fun, quirky look.
Chlorophytum Comosum ‘Ocean’ – Compact variety with green and white striping. Stays smaller than standard varieties, perfect if you want that spider plant vibe without the sprawl.
Solid Green Spider Plant – No variegation, just pure green leaves. Actually slightly harder to find than variegated types. These tend to be more tolerant of lower light conditions since they have more chlorophyll.
For practical care purposes, all these varieties need basically the same treatment. The variegated types just need a bit more light to maintain those pretty stripes.
Light Requirements: Flexible but Preferential
Here’s what I love about spider plant care – these guys are super flexible with lighting. They’ll survive in conditions that would make other plants give up completely. But there’s a difference between surviving and thriving, so let’s break it down.
Spider plants prefer bright, indirect light. Think of a spot near an east or north-facing window where they get plenty of ambient brightness without direct sun beating down on them. In these conditions, growth is fast, colors are vibrant, and those plantlets appear frequently.
I keep one of my spider plants about 4 feet from a west-facing window, and it produces spiderettes like it’s going out of style. The variegation is crisp and defined, and new leaves emerge regularly.
But here’s the thing – spider plants can tolerate a pretty wide range of light conditions:
Bright indirect light – Optimal growth, vibrant colors, lots of babies. This is the sweet spot.
Medium light – Slower growth but still healthy. Variegated varieties might lose some contrast in their stripes.
Low light – They’ll survive, but growth slows way down, variegation can fade, and you probably won’t get many (or any) plantlets.
Some direct sun – Morning sun is generally fine, but harsh afternoon sun can scorch those thin leaves, causing brown, crispy patches.
What about artificial light? Spider plants do great under grow lights! If you don’t have ideal window space, a simple LED grow light works perfectly. I have one spider plant thriving under a grow light in my basement – you’d never know it wasn’t getting natural sunlight.
One thing I’ve noticed – if your spider plant starts looking pale or the leaf tips turn brown, try adjusting the light. Too much direct sun causes crispy tips, while too little light causes pale, lackluster growth.
Watering Your Spider Plant: The Goldilocks Approach
Spider plants are pretty forgiving with watering, but they definitely have preferences. These plants like their soil to dry out partially between waterings – not bone dry, but not constantly moist either.
During spring and summer growing season, I water my spider plants when the top inch of soil feels dry to the touch. This usually works out to once a week, but it really depends on your conditions – temperature, humidity, pot size, and soil type all affect how quickly soil dries.
When you water, do it thoroughly until water drains from the bottom. This ensures the entire root system gets hydrated and helps prevent salt buildup in the soil. Always empty the drainage tray – spider plants hate sitting in water.
In fall and winter, cut back on watering. The plant’s growth slows down, so it needs less moisture. I usually water every 10 to 14 days during winter months, always checking soil moisture first.
Signs of overwatering: Root rot, yellowing leaves, mushy brown spots at the base of leaves, soil that stays wet for days, black or brown mushy roots.
Signs of underwatering: Leaves drooping, brown crispy tips (though this can have other causes), leaves losing their arch and looking limp, soil completely dry and pulling away from pot edges.
Here’s something cool about spider plants – those thick, fleshy roots and tuberous root system store water, making them somewhat drought-tolerant. They can handle a missed watering way better than being overwatered.
Water quality matters with spider plants. They’re sensitive to fluoride and chlorine in tap water, which causes those infamous brown leaf tips. If you notice tip burn, try:
- Using filtered or distilled water
- Letting tap water sit out for 24 hours before using (chlorine evaporates)
- Collecting rainwater for watering
- Using water from a dehumidifier (if you have one)
I started using filtered water for my spider plants and the difference was noticeable. New growth comes in without brown tips, and the plants just look healthier overall.
Soil and Potting: Setting Up for Success
Spider plants aren’t picky about soil, but they perform best in a well-draining potting mix. Standard all-purpose potting soil works fine, but I like to improve drainage by adding some perlite or coco coir.
My go-to spider plant soil mix:
- 70% quality potting soil
- 20% perlite
- 10% coco coir or compost
This mixture retains enough moisture to keep roots happy while allowing excess water to drain quickly. Spider plants don’t like soggy soil, so good drainage is key to preventing root rot.
Pot selection is straightforward – drainage holes are essential. Spider plants can handle being slightly rootbound (they actually seem to like it), but they still need proper drainage to thrive.
Hanging baskets are perfect for spider plants since those trailing plantlets look amazing cascading down. Just make sure your hanging basket has drainage holes or a removable liner with holes. I use a plastic nursery pot inside a decorative hanging basket – gives me the look I want with the drainage the plant needs.
Pot size matters but not as much as you’d think. Spider plants tolerate being rootbound pretty well and often produce more plantlets when their roots are somewhat cramped. When you do repot, only go up 1 to 2 inches in diameter.
When to repot: Every 1 to 2 years, or when roots are seriously overcrowded and pushing out of drainage holes. Spring is the ideal time. I recently repotted a spider plant that had literally lifted itself out of its pot from root pressure – that’s how you know you’ve waited too long!
Spider plants have thick, tuberous roots that can break through plastic pots if seriously rootbound. It’s actually kind of impressive how strong they are.
Temperature and Humidity: Easy-Going Tropicals
Spider plants are incredibly adaptable when it comes to temperature and humidity. They tolerate average home conditions without complaint, which is part of what makes them such excellent houseplants.
Temperature: Spider plants are happy between 55°F to 80°F (13°C to 27°C). They can handle temperatures slightly outside this range but growth slows down at the extremes.
Avoid these temperature situations:
- Cold drafts from windows or doors in winter
- Direct placement near heating vents
- Air conditioning blasting directly on the plant
- Sudden temperature fluctuations
Spider plants can tolerate brief exposure to temperatures down to 35°F (2°C), but prolonged cold will damage or kill them. If you put your spider plant outside for summer (which they love), bring it in before nighttime temps drop below 50°F.
Humidity: These plants prefer moderate humidity around 40-60%, which is basically average household humidity. Unlike some tropical plants that turn dramatic in dry air, spider plants handle lower humidity reasonably well.
That said, higher humidity does help prevent those brown leaf tips. If you live in a very dry climate or run heating all winter, consider:
- Running a humidifier nearby
- Grouping plants together
- Misting occasionally (though this is more for cleaning than humidity)
- Placing the pot on a pebble tray with water
I don’t do anything special for humidity with my spider plants, and they’re perfectly happy. They’re really that low-maintenance.
Fertilizing: Light Feeders That Appreciate a Meal
Spider plants are not heavy feeders, but they do appreciate occasional fertilization during the growing season. Proper feeding results in more vigorous growth, better color, and more of those adorable plantlets.
I fertilize my spider plants once a month during spring and summer using a balanced liquid fertilizer diluted to half strength. I use a 10-10-10 or 20-20-20 NPK formula. The half-strength dilution is important – spider plants are sensitive to fertilizer salts, which can cause brown leaf tips.
During fall and winter, I stop fertilizing completely. The plant’s metabolism slows way down, so it doesn’t need extra nutrients.
Fertilizer tips for spider plants:
- Less is more – these plants don’t need much
- Always apply fertilizer to moist soil, never dry (prevents root burn)
- Flush soil with plain water every few months to remove salt buildup
- Organic options like worm castings or compost tea work great
- If you see brown tips, you might be over-fertilizing
Signs of over-fertilizing:
- Brown, crispy leaf tips
- White crusty buildup on soil surface
- Leaves losing variegation or looking burned
Signs of under-fertilizing:
- Pale, yellowing leaves (if not a watering issue)
- Very slow growth during growing season
- Lack of plantlets
Honestly, spider plants are so low-maintenance that I sometimes forget to fertilize, and they still do fine. They’re forgiving like that.
Propagating Spider Plants: The Easiest Plant to Multiply
Let me tell you – spider plant propagation is so easy it’s almost ridiculous. These plants basically propagate themselves by producing those spiderettes. You just have to pot them up. It’s like the plant is doing 90% of the work for you.
Method 1: Water Propagation
This is my favorite method because you can watch roots develop.
Cut a spiderette from the mother plant (leave about an inch of stem attached). Place it in a small jar or glass of water, making sure the base is submerged but leaves stay dry. Place in bright, indirect light and change the water every few days.
Roots will develop within 1 to 2 weeks – it’s crazy fast! Once roots are about an inch long, pot the baby up in soil. Keep soil moist for the first week or two while it adjusts.
Method 2: Direct Soil Propagation
Even easier – fill a small pot with moist potting soil and place the spiderette on top, gently pressing it into the soil. You can leave it attached to the mother plant via the stolon until roots establish (about 2-3 weeks), then cut the connection. Or cut it immediately and keep soil moist.
This method has a super high success rate because the plantlet is already partially developed.
Method 3: Layering
Place a pot of soil next to your mother plant. Bend a stolon over and nestle the spiderette into the soil while it’s still attached to the mother plant. The baby will root while still receiving nutrients from mom. After a few weeks, cut the stolon connection.
This is basically foolproof – the baby can’t fail because it’s getting support from the mother plant the whole time.
I’ve propagated dozens of spider plants and literally never had one fail. I give them away to friends, start new plants for different rooms, and even leave some in my office. It’s the gift that keeps on giving.
Best time to propagate: Spring or summer when the plant is actively growing, though honestly, spider plants propagate successfully year-round. They’re just not picky.
Pruning and Maintenance: Keeping Things Tidy
Spider plants need minimal pruning, but a bit of maintenance keeps them looking their best.
What to prune:
- Brown or yellow leaves (cut at the base)
- Brown leaf tips (trim with clean scissors)
- Dead or damaged foliage
- Excessive plantlets if they’re getting out of control
How to prune: Use clean, sharp scissors. For brown tips, cut at an angle following the natural leaf shape. For entire leaves, cut as close to the base as possible without damaging surrounding foliage.
I trim brown tips off my spider plants every few weeks. It’s meditative and keeps them looking fresh. The key is using sharp scissors – dull ones crush the leaf edge and cause more browning.
Removing plantlets: If your spider plant is producing so many babies that it’s getting exhausted, feel free to cut some off. The plant puts energy into producing and supporting those plantlets, so removing some allows it to focus on its own growth.
Cleaning leaves: Dust blocks light and reduces photosynthesis. Every few weeks, I wipe down spider plant leaves with a damp cloth or give the whole plant a shower. This removes dust and lets me inspect for pests.
Spider plants can also be divided when they get too large. Simply unpot the plant, gently separate it into sections (each with roots attached), and pot up the divisions. Best done in spring.
Common Problems and Solutions
Spider plants are super easy, but a few issues do pop up regularly. Here’s how to troubleshoot:
Brown Leaf Tips
This is the most common spider plant complaint. Causes include:
- Fluoride or chlorine in tap water (most common)
- Over-fertilizing
- Low humidity
- Inconsistent watering
- Salt buildup in soil
Solution: Switch to filtered or distilled water, reduce fertilizer, flush soil to remove salts, trim brown tips for appearance.
Yellow Leaves
Usually indicates:
- Overwatering (most common)
- Underwatering
- Too much direct sun
- Natural aging of older leaves
Solution: Adjust watering routine, check soil moisture before watering, move if getting too much direct sun.
Pale or Faded Leaves
Variegation losing contrast or green leaves looking washed out:
- Insufficient light
- Over-fertilizing
- Natural variation
Solution: Move to brighter location, reduce fertilizer.
No Plantlets Forming
Spider plants need to be mature (usually 1-2 years old) and slightly rootbound to produce babies. Also:
- Insufficient light reduces plantlet production
- Too much fertilizer (especially nitrogen) promotes foliage over reproduction
- Young plants aren’t mature enough
Solution: Ensure bright light, let plant become slightly rootbound, be patient with young plants.
Wilting or Drooping Leaves
- Underwatering (most common)
- Root rot from overwatering
- Temperature stress
Solution: Check soil moisture, adjust watering, ensure proper drainage.
Slow Growth
- Low light
- Lack of nutrients
- Rootbound (severely)
- Dormant season (normal in winter)
Solution: Increase light, fertilize during growing season, repot if extremely rootbound.
Pests: Rare but Possible
Spider plants are relatively pest-resistant, but they can still get unwanted visitors.
Aphids: Small, soft-bodied insects on new growth. Rinse off with water or use insecticidal soap.
Spider Mites: Ironic, right? These tiny pests cause stippled yellowing on leaves. Increase humidity, rinse plant thoroughly, treat with neem oil.
Mealybugs: White cottony pests in leaf crevices. Dab with rubbing alcohol on a cotton swab, follow up with neem oil.
Scale: Brown bumps on leaves and stems. Scrape off and treat with neem oil or insecticidal soap.
Prevention is easier than treatment. Regularly inspect your plant, keep leaves clean, quarantine new plants, and provide good air circulation.
I rarely see pests on spider plants. They’re just not a common target, which is another reason they’re so great for beginners.
Benefits of Growing Spider Plants
Beyond being easy to care for and gorgeous, spider plants offer real benefits:
Air Purification: NASA’s Clean Air Study found spider plants effectively remove formaldehyde, xylene, and carbon monoxide from indoor air. They’re natural air purifiers that improve your home environment.
Pet Safe-ish: While not technically toxic, spider plants can cause mild stomach upset in cats and dogs if eaten. Cats are especially attracted to the grass-like leaves. The plants themselves aren’t harmed by nibbling, though your pet might have some digestive issues. If you have cats that can’t resist, place the plant out of reach.
Easy Propagation: Free plants forever! Share with friends, expand your collection, or use as gifts.
Forgiving Nature: Perfect for beginners, busy people, or anyone who occasionally forgets to water.
Versatile Decor: Works in hanging baskets, on shelves, as a tabletop plant, or even in terrariums when young.
I have spider plants in multiple rooms because they’re just that reliable and good-looking. They never let me down.
Spider Plant Care: Quick Reference Guide
Light: Bright to medium indirect light. Tolerates low light but grows slower. Avoid harsh direct sun.
Water: When top inch of soil is dry. Water thoroughly until it drains. Reduce watering in winter.
Soil: Well-draining potting mix. Standard potting soil with added perlite works great.
Temperature: 55-80°F (13-27°C). Average home temperatures perfect. Keep away from cold drafts.
Humidity: 40-60% ideal but tolerates lower. Average household humidity fine.
Fertilizer: Balanced liquid fertilizer at half strength once monthly during spring/summer. Stop in fall/winter.
Pruning: Trim brown tips and dead leaves as needed. Remove excess plantlets if desired.
Repotting: Every 1-2 years in spring. Can tolerate being rootbound. Use pot with drainage.
Propagation: Cut spiderettes and root in water or soil. Extremely easy, high success rate.
Toxicity: Non-toxic but can cause mild stomach upset if pets eat it. Generally safe.
Growth Rate: Fast growing in good conditions. Produces plantlets when mature and slightly rootbound.
Common Issues: Brown leaf tips (water quality), yellow leaves (overwatering), no babies (too young or low light).
Final Thoughts: Spider Plant Success
Spider plants are honestly one of the best houseplants you can grow. They’re forgiving, adaptable, easy to propagate, and absolutely gorgeous. Whether you’re a complete beginner who’s nervous about killing plants or an experienced plant parent looking for something low-maintenance, spider plants deliver.
The care requirements are minimal – decent light, regular watering, and occasional feeding. That’s basically it. The plant will tell you what it needs through its foliage, and adjustments are simple.
I love that spider plants have been popular for decades and continue to be favorites. They’re not trendy plants that’ll be forgotten next year – they’re classics that have earned their place in homes worldwide. There’s a reason your grandma probably had one, your mom probably had one, and now you want one too.
Start with a basic variegated spider plant if you’re new to houseplants. Watch it grow, propagate some babies, and enjoy the process. Once you see how easy and rewarding spider plants are, you’ll understand why they’ve been beloved houseplants for generations.
Get yourself a spider plant, give it a decent spot with some light, water it when needed, and watch it thrive. Before long, you’ll have babies to share, healthier indoor air, and a stunning cascading plant that makes your space feel more alive.
Happy planting!


